You might also like
Check items to add to the cart or
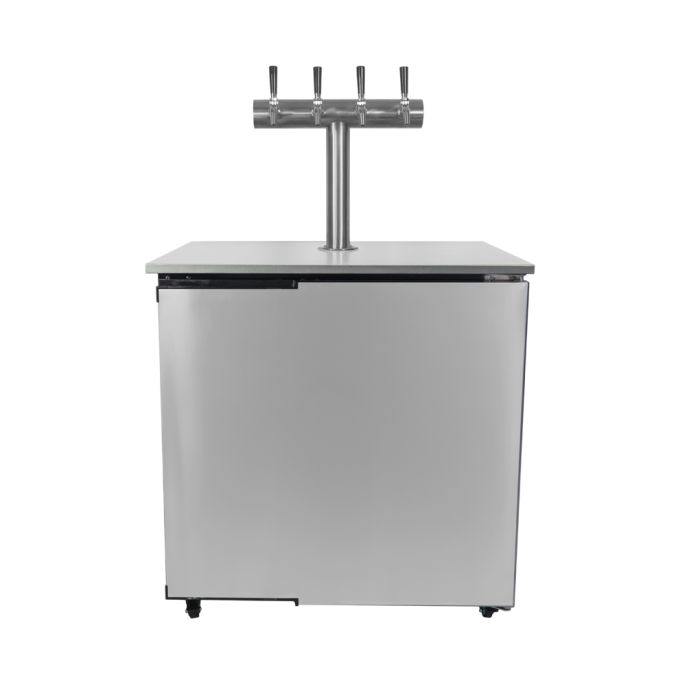
The KegMaster Solstice is a spacious 6-keg kegerator that combines energy-efficient power usage, eco-friendly operation, and smart design features to perfectly fit your lifestyle. With its innovative heating and cooling capabilities, it stands out as the most versatile kegerator available.
The KegMaster Solstice is a game-changer in kegerator design, offering unmatched versatility and innovation. Powered by both DC power and the option to run on solar power or batteries, this kegerator is perfect for off-the-grid adventures, whether you're enjoying cold beer in a caravan, on a boat, at a mobile bar, or at a festival. It’s built to keep your kegs perfectly chilled, no matter where you are.
And when you're at home, simply plug the KegMaster Solstice into any standard 10-amp household outlet, and you'll be enjoying your favorite beverages on tap in style. With its sleek, all-stainless steel design, this kegerator delivers both function and beauty, making it the ultimate choice for any beer enthusiast. Get ready to take your beer experience to the next level with the KegMaster Solstice!
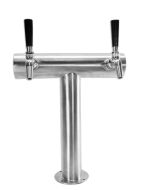
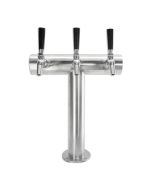
Please be aware that taps and fonts are not included!
Kegmaster is the Highest Level Draft Experience
Meet the KegMaster Solstice 236 Kegerator, a spacious 6-keg kegerator that combines energy-efficient power usage, eco-friendly operation, and smart design features to perfectly fit your lifestyle. With its innovative heating and cooling capabilities, it stands out as the most versatile kegerator available. The versatile design of Solstice allows it to be used as a freestanding unit or effortlessly built into your kitchen or bar space, making it a stylish and practical addition to any setting.
Kegmaster Solstice draft systems are designed to transform how you enjoy beverages on tap, offering more internal space for a wider variety of beverage options on tap. Life gets better, more exciting, and undeniably more refreshing when you have the Kegmaster Solstice in your entertaining space.
With the Kegmaster Solstice, there is always a new beverage experience just a tap pull away. Transform your lifestyle, save money, and enjoy drinks at their freshest on tap from a Kegmaster kegerator.
Enjoy The Freshest Drinks Always
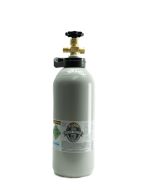
Say goodbye to stale, flat drinks and hello to beverages that taste as fresh as the moment they were made. The Kegmaster Solstice Kegerator pairs with carbon dioxide dispensed from a co2 cylinder to keep your drinks perfectly carbonated and fresh for as long as it takes to finish the keg. Whether you’re enjoying a crisp lager, a bubbly sparkling wine, or even fresh juice, your beverages stay at peak quality, ready to serve.
By keeping your keg beer and other drinks sealed and pressurized, the Kegmaster Solstice eliminates the waste and flavor degradation associated with bottled or canned beverages. Each pour is as satisfying as the first, ensuring you always serve drinks that impress.
Visually Stunning
KegMaster Solstice is constructed of 304 stainless steel providing visual impact and easy to maintain, sanitary surfaces inside the kegerator, on the outside walls and benchtop.
Outside or Inside
KegMaster Solstice is rated for temperatures of 40c ambient which makes it ideal for both an inside AND outside environment.
High Capacity
The KegMaster Solstice provides 236L of space that can easily hold six (6) Cornelius Variety Ball Lock Kegs, or four (4) 20L P.E.T. King Kegs + one (1) Cornelius Keg. Alternatively, a 50L commercial keg and gas cylinder can also be installed within the fridge space.
Unique Cassette Design
The innovative heating and cooling cassette design of the KegMaster Solstice provides a simple solution to quick, quiet temperature cycles. The cassette can easily be removed and replaced if required by simply removing six screws that attach the cassette to the kegerator body. The walls and benchtop of the KegMaster Solstice contain no coolant lines. All cooling and heating are provided to the kegerator from the cassette.
Cooling or Heating
This dual temperature feature provides users with the ability to use the heating for fermentation or curing of small goods, or switch to cooling mode to bring kegged beverages down to serving temperatures quickly for draught tap dispensing. Simply set the controller to the temp you require and the KegMaster Solstice will keep that temp accurately and efficiently.
Power Flexibility
The included 240V DC power pack provides home users with the ability to simply plug their KegMaster Solstice kegerator into any standard Australian 10amp household power outlet. The flexibility of the 12 volt DC design means that your KegMaster Solstice kegerator can also be powered by batteries, solar or any mix of these that can provide 12 volts at 15amp max supply. This means KegMaster Solstice can be installed on boats, in caravans or anywhere that you can supply the power requirements.
Environmentally Friendly
KegMaster Solstice utilises environmentally friendly R600 refrigerant.
Inclusions:
NOT INCLUDED:
This is the answer to the question1. It will expand when the question is clicked.
This is the answer to the question2. It will expand when the question is clicked.
The Solstice Cassettes are quite robust but some conditions may cause them to function incorrectly or not at all like most refrigerators. Before going through this it is desirable that you have the manual with you and have looked at how it should be installed, set up etc. Here are some basic steps to check if a cassette is working correctly or not:
| Controller: |
HJ-510 | ||||
| Name | Description | Unit | Normal Setting | Extended Defrost | Lower Min. Temp |
| F1 | Set Temp (Cool) | C | 2.0 | x | x |
| F2 | Set Temp (Heat) | C | 40 | x | x |
| F3 | Hysteresis (Cool) | C | 3.0 | x | x |
| F4 | Hysteresis (Heat) | C | 3.0 | x | x |
| F5 | Probe calibration (Cool) | C | 0.0 | x | x |
| F6 | Probe calibration (Heat) | C | 0.0 | x | x |
| F7 | Compressor Delay | min | 03 | x |
x
|
| A1 | Alarm Mode | - | 01 | x | 01 |
| A2 | Alarm timeout (Heat) | min | 15 | x | x |
| A3 | Alarm timeout (Cool) | min | 15 | x | x |
| A4 | Alarm Low Temperature | C | 0 | x | -15 |
| A5 | Alarm High Temperature | C | 60 | x | x |
| A6 | Alarm Speaker Enable | - | 1 | x | x |
| d1 | Defrost Time | min | 10 | 15 | 15 |
| d2 | Defrost Period | hr | 04 | 03 | 03 |
| d3 | Defrost mode | - | 01 | 00 | 00 |
| d4 | Defrost Display | - | 01 | 01 | 01 |
With the Solstice Cassettes now being in use for almost two years we find that they are generally quite reliable and if operated correctly do not have issues.
Nearly every unit which has a problem reported ends up being related to the fact that the evaporator coil can become iced up if there is too much moisture in the air. Generally it can happen very quickly if the door is left open for long periods or it can build up over time lulling the operators into a false sense of all being ok.
Due to its compact design the evaporator coil has to get quite cold to function effectively and this of course means that ice can form easily if there is moisture in the air. For that reason the controller does have a defrost cycle which periodically activates the heating system to clear the surface ice that it can be expected to build up. We do see some operators turning the defrost off and that is of course not advisable. We also see operators setting the temperature down to 0 degrees which of course it can achieve but it is not really desirable to serve beer at such low temperature (easy to get frozen beer lines that way also). Usually a setting of 2 degrees should be adequate. We also recommend the hysteresis to be no less than 2 degrees but preferably 3 degrees. This setting determines how many degrees the air temp in the fridge will rise before the compressor comes on and drives the temperature to 0 again.
So usually if in doubt set the controller back to its default with a factory reset. You will find how to do this in the manual supplied with the fridge.
Unfortunately not many people have a good understanding of how a fridge works and tend to think a beer fridge is like the kitchen fridges in most homes. Kitchen fridges are designed to be able to handle the frequent opening and loss of the cold air inside. Beer fridges on the other hand should really only be opened when a keg is being changed.
What to do if your cassette based fridge only cools down to somewhere between 10-14 degrees? This is usually the giveaway that the evaporator coil has iced up to some degree or even completely. Here are the steps you can take to overcome the problem:
1. Unplug the cassette and using a Phillips head screw driver carefully undo the 6 screws holding the cassette in situ.
2. Remove the cassette from the fridge.
3. Examine the evaporator coil which is located behind the fan towards the upper part of the cassette. If the ice had built up so much that it touches the fan blades then you might have heard a whirring sound when the fan was operating. In severe cases the ice can stop the fan from rotating.
4. Using a torch or phone light look past the fan blades to see if ice is present and if so how much. Because the chamber in which the evaporator coil is situated is very well insulated it can be quite difficult to remove this ice. DO NOT USE ANY SHARP OBJECTS to scrape any ice away. This can only be done by warming the unit. Sharp objects could damage the coils and release the refrigerant.
5. The ice can build up into a solid block which may take several days to melt by itself. If the cassette is still in the fridge it will of course take longer.
6. The best way to remove the ice is to face the cassette evaporator fan to strong sunlight or use a fan heater to direct a stream of warm air towards the coil.
7. If in doubt about being able to see ice you can cut the pointy end off a 25 cm ZIP tie and gently push it through the vanes of the evaporator coil. It should go through free and easy and not be blocked.
8. If the ice deposit is not heavy enough to fully block the evaporator coil then you can set the controller to heating and run it that way for an hour or so and that will help clear the ice out.
9. Melted water from the ice will make its way slowly past the kink in the ribbed tubing and end up in the evaporation tray above the compressor.
10.This operation may be done with the cassette installed in the fridge or not. For how to set the heating please see the manual.
So once the cassette is cleared of ice then the fridge should operate normally again. As mentioned before do not open the door any more than is necessary especially in humid, warm climate regions.
Without active intervention the ice can persist in the insulated evaporation chamber for the better part of a week and if not fully cleared will quickly make a comeback.
Below you will find the questions we get asked the most regarding our Keg King Kegerators.
Please click on one of the questions below to see the answer.
A Kegerator, or Keg Fridge, is a fridge designed specifically to dispense your favourite beverage from various keg sizes via a drought system set up on top of the fridge. Yes, you can have a drought system at home and pour yourself icy cold drinks anytime you want in the comfort and safety of your own home.
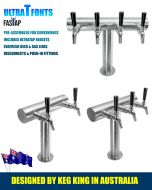
FasTap means everything has been pre-assembled for you. If one of our packages mentions FasTap, it means we have done the hard work for you and you will only have to assemble the font beer tower to the fridge and the wheels under the fridge should you want to add them, that's it!.
First, congratulate yourself on getting Keg King products. Next, follow the assembly instructions in the included manual or by scanning the QR code on your box. This will open the product page on our website where you will also find assembly instructions as a digital file How to setup your Keg King Kegerator.
We’ve designed the FasTap range to be as user friendly as possible. If you haven’t set one up before it’s worth watching our YouTube video. Push in fittings and a pre-assembled font tower mean you can have the unit setup in about 15mins. Once setup, there isn’t anything easier than pulling the handle and having an ice cold beer whenever you like!
It is normal for the first pour to have a little more foam as the tap cools. If you’re in a warm climate and this is an issue you can pour 100ml or so and put it aside to settle. The tap will be cold now and pour a perfect beer. If you’re consistently getting too much froth, the beer may be too warm, there is an issue with the system, or the beer is over-carbonated. We have a comprehensive guide of fixing this here and also a good video guide here.
We have a range of keg fridges so suit your budget and situation. Our Super Deluxe range are commercial grade and considered the cream of the crop of Keg Fridges. Our KegMaster and KegMaster XL units are hugely popular and are the most cost effective way to get beer on tap. They are also a little quieter than commercial style fridges so great for the home. The Solstice fridge is in between these two, it can hold up to 6 kegs and is constructed of 304 stainless with a unique cassette for cooling in Aussie conditions up to 40C.
We have a range of font/tower options to suit the look you’re after. Our UltraT is a “T” shape similar to many bars, with the advantage of working well with air-cooling from a kegerator. Our modular fonts are a bit more industrial and are popular in many breweries, the also can be flooded with liquid if using with an icebank or our in house designed Thermentor King Max. We can even have towers custom made in stainless, copper, brass or gold the same as used in thousands of pubs around Australia. .
If you’re having trouble with your unit cooling, check out this guide here. If you’re having foaming issues, check here.
Kegs of beer can be purchased and delivered from companies like Kegs on Legs. There are also many Brew on Premises places around now where you can get a range of beers for a great price. Many breweries are now selling beer in our 10 or 20L King Keg. These are recyclable PET kegs, so you don’t need to pay a deposit. Check with your favourite local brewery if they offer these yet!
Mounting the fridge unit under a bar/bench is a popular option. You can then mount the font/tower on top and run the lines though, the font has a flange with 4 screw holes so it’s easy to mount. You’ll also need to seal where the lines run into the fridge, the easiest way to do this is with a Telescopic Font Adaptor.
Our KegMaster and KegMaster XL dissipates heat from the sides of the unit so they need some ventilation. 100mm on the left and right is recommended but a minimum of 50mm is required. If you’re putting the unit behind a cabinet door, remember the warm air needs somewhere to rise and escape from, and cool air needs somewhere to enter down low too.
Regular house KegMaster Kegerators such as our Series XL work very well inside and are intended for inside use. Four outdoors use, you want to future proof yourself by installing one of our Solstice KegMasters. With a 12V DC power, it can run directly on solar panels making it the most environmentally friendly home bar on the market. Made of full stainless steel, it will look just as good built into your alfresco or patio as it will as a stand alone. For the ultimate set-up, don’t forget to add our Ultra T Font to look exactly like a bar!
Absolutely! Keg King was actually the first to start importing and then later start designing & manufacturing the KegMaster Series Kegerators. We have the perfect inside home bar with our Series XL KegMaster Kegerator or the perfect outdoors home bar with our Solstice KegMaster Kegerator. We don’t just manufacture kegerator and home bars, we are providing the right equipment for your ideal home set up.
The easiest way to pour some icy cold schooners at home is to set up one of our inside home bar with our Series XL KegMaster Kegerator or the perfect outdoors home bar, our Solstice KegMaster Kegerator. We don’t just manufacture kegerator and home bars, we are providing the right equipment for your ideal home set up.
The easiest way to start pouring some beers in no time, is to install one of our inside home bars with our Series XL KegMaster Kegerator which comes with pre-assembled fonts; literally 4 screws and you’re pouring! Check out our instal video to see how easy it is to install.
Homebrewing has never been easier, all you will need is our Australian made Apollo fermenter, a gas cylinder & regulator and a keg! It’s that easy. For more information on our beginner set-up, click here.
Pressure fermenting helps reduce the production of undesirable esters in your brew which is the most common advantage for pressure fermenting. Other advantages include having beer already carbonated once fermentation is finished, doing easy oxygen free closed transfer to kegs or simply being able to use your fermenter both as a fermenting vessel and a serving vessel.
The easiest to use fermenters for new brewers are our Australian made Juniors, Chubby and the king of all, the Apollo 30L.
You can check with your local breweries otherwise in Melbourne that are quite a few breweries we work with and can recommend. If you are contacting your local breweries, we recommend to ask them for their 10L PET King Kegs.
We are not just online, we actually have a really nice showroom with our KegMaster kegerators where you can come down with your partners and family to find the perfect KegMaster for your home environment.
We most certainly do! As experts, you can count on us to provide the perfect quote for your perfect set up in a timely manner. Additionally, we revisit our delivery options yearly in order to provide our customers with the best and most reliable freight possible.
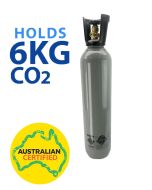
Yes, we do! We have a large pool of gas cylinders pre-filled so you can do a cylinder swap in under 2 minutes.
At this stage we are not offering KegMaster Kegerator installs however we have it made it incredibly easy to install them; our Series XL KegMaster Kegerator comes with pre-assembled fonts and taps, literally 4 screws and you’re ready to pour these icy cold schooners! Check out our instal video to see how easy it is to install.